Introduction
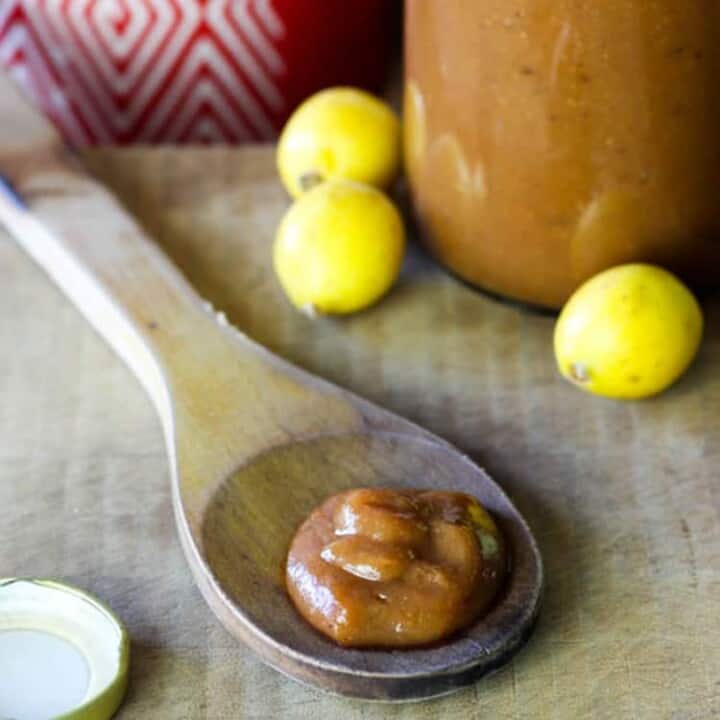
If you’ve come across loquats in your garden or local market, you’re in for a treat! This small yet flavourful fruit, with its perfect balance of sweetness and tanginess, is ideal for making homemade jam. If you’re looking for a simple and tasty way to preserve the fresh taste of loquats, this recipe is just what you need. Let’s dive into how you can create your own batch of loquat jam to enjoy throughout the year!
Why Make Loquat Jam?

Loquats may not be as well-known as other fruits, but they are packed with a unique blend of flavours, reminiscent of apricots, peaches, and citrus. This makes them an excellent choice for jams and preserves. Making loquat jam is a great way to make the most of loquat season and avoid wasting this delicious fruit. Whether spread on toast, swirled into yoghurt, or used as a dessert topping, loquat jam is sure to become a favourite in your kitchen!
Loquat Jam Recipe
Ingredients:-
- 4 cups of loquats (peeled, pitted, and chopped)
- 2 cups of granulated sugar
- 1 tablespoon of lemon juice
- ¼ cup of water
- ½ teaspoon of vanilla extract (optional)
Instructions:-
1. Prepare the Loquats
Start by peeling the loquats and removing the seeds. Loquats have soft, juicy flesh, but their seeds should be discarded as they can be bitter. Chop the fruit into small pieces and set them aside.
2. Cook the Loquats
Place the chopped loquats in a large saucepan with water and lemon juice. Cook over a medium heat for about 10–15 minutes, stirring occasionally. As the fruit softens, use a potato masher or fork to break it down to a chunky consistency. If you prefer a smoother jam, mash it further.
3. Add the Sugar
Once the loquats have softened, stir in the granulated sugar and bring the mixture to a gentle boil. Cook for around 20–30 minutes, stirring frequently to prevent it from sticking or burning. As it cooks, the mixture will thicken into a jam-like consistency.
4. Check the Consistency
To check if the jam is ready, drop a small amount onto a chilled plate. Let it cool for a few seconds, then run your finger through it. If the jam wrinkles and holds its shape, it’s done. If not, cook for a few more minutes and test again.
5. Add Vanilla (Optional)
If you’d like to enhance the flavour, add a splash of vanilla extract and stir it in. This step is optional, but it adds a lovely depth to the jam.
6. Jar the Jam
Remove the jam from the heat and allow it to cool slightly. Pour it into sterilised jars, leaving a little space at the top to prevent overflow. Seal the jars tightly and let them cool to room temperature.
7. Store and Enjoy
Keep the jam in the fridge, where it will stay fresh for up to 2–3 weeks. For long-term storage, use proper canning techniques, and your jam can last for months. Once you taste this sweet and tangy jam, you’ll be reaching for it again and again!

Why You’ll Love This Loquat Jam
This homemade loquat jam captures the unique flavours of the fruit, balancing sweetness with a touch of tanginess. It’s an easy and satisfying recipe, perfect for both beginners and experienced jam-makers. Not only is it a fantastic way to preserve loquats, but it also makes a thoughtful homemade gift!
Enjoy it on toast, with cheese, or as a topping for cakes and desserts – however you serve it, this loquat jam is sure to impress!
Join the Conversation!
Have you ever made loquat jam before, or are you planning to try it now? Share your experience in the comments below! If you have any variations or tips, we’d love to hear them. And don’t forget to share this recipe with friends and family who love homemade jams. Happy cooking!
Final Thoughts
Loquats may not be the most common fruit, but their wonderful taste makes them a fantastic choice for jam-making. This easy recipe will help you enjoy their fresh, tangy flavour long after the season has ended. Why not give it a try?
For more tips, recipes, and fascinating fruit facts, visit Frutifyx.com!
Stay connected with us on YouTube!
Let me know if you’d like any tweaks! 😊
Thank you….!
